




What are Plaster Beads?
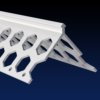
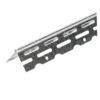
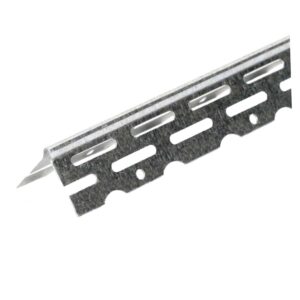
Plaster beads are profiles designed to provide straight, reinforced edges and clean finishes on plastered surfaces. They’re commonly used on corners, reveals, window and door frames – basically anywhere you need a defined, crisp edge. Available in PVC, galvanised metal and plasterboard-compatible options, they offer flexibility for both internal plastering and drylining applications.
At P1 Plastering Superstore, we stock a carefully selected range of high-quality beads from leading manufacturers like Renderplas and Catnic, chosen for their suitability for real-world site conditions. Whether you need reinforced corners, smooth reveals or reliable stop beads, our range has you covered. Plus, our team of experts are always on hand to provide guidance and support, helping you choose the right bead for your project and ensuring a professional finish every time.
When are Plastering Beads Required?
Plastering beads are used with gypsum plaster, multi-finish plaster, skim coats and other traditional plastering materials to ensure a professional finish. They’re essential wherever you need straight lines, durable edges, or defined junctions between surfaces.
Common applications include:
- Facade Corners
Protect and define internal and external corners, preventing chipping, cracking or uneven finishes.
- Reveals and Window/Door Frames
Create neat, professional edges around openings, ensuring the plaster stops cleanly and consistently.
- Stop Points
Provide a defined termination point for plaster runs on walls and ceilings, helping maintain straight edges without over-plastering.
- Feature Details
Highlight architectural elements like arches or columns, giving a polished, precise finish while reinforcing the plaster in high-traffic areas.
- Transitions Between Materials
Smooth the junction between plasterboard and traditional plaster, or between different plaster types, helping to avoid weak points that could crack over time.
Types of Plaster Beading
Plaster beads are a key tool in any plasterer’s kit. Available in PVC and galvanised steel, they’re designed to suit a variety of plastering techniques and materials, from multi-finish plaster to skim coats and thin-coat systems.
Here’s a breakdown of the most commonly used types and their applications:
Plaster Skim Corner Beads
Skim corner beads are used on internal or external corners to protect edges from knocks and ensure a straight, even finish. Typically installed before applying the plaster skim, they guide the plaster application and maintain consistent angles, helping you avoid unsightly cracks or uneven lines.
Plaster Stop Beads
Stop beads provide a neat termination point for plaster on walls, ceilings or around openings. They’re ideal for defining the edge of a plaster run, preventing over-plastering and offering a reinforced finish that holds up over time, particularly on high-traffic areas.
Plaster Hook-On Beads
Hook-on beads are designed for easy attachment to plasterboard or lath surfaces. They securely hold plaster in place while allowing quick, accurate installation. These beads are perfect when you need a fast, reliable way to define edges without compromising on finish quality.
Plaster Thin Coat Beads
Thin coat beads are specifically designed for modern thin coat plaster systems. Lightweight yet durable, they provide sharp edges and clean lines while being easy to cut, handle and embed. They’re ideal for use with high-performance plasters that require precise control and a smooth finish.
Plaster Edge Beads
Edge beads are versatile profiles that protect wall edges and corners from damage while ensuring a straight, clean line. Available in PVC or galvanised steel, they’re suitable for both traditional and contemporary plastering techniques, providing durability and professional results across any project.
Why Choose Plastering Beads?
The right bead gives your plaster work structure, control, and a clean, professional finish without wasting time or materials. Here’s why plastering beads are a must-have for any pro:
- Crisp Corners Every Time
Internal corners can be a nightmare without the right guide. Plaster beads give you a straight edge to work against, keeping corners sharp and consistent, even on long runs or high walls.
- Edge Protection from Wear
Plaster is fragile until fully cured. Beads reinforce corners and terminations, protecting them from knocks, scrapes and general day-to-day site abuse. No more patching chipped corners a week after finishing.
- Faster, Cleaner Application
A good bead acts like a track for your trowel. It helps control plaster thickness and keeps lines straight, meaning less sanding, fewer touch-ups and more time moving onto the next job.
- Flexible for Different Plasters
Whether you’re using traditional multi-finish, gypsum or thin-coat plasters, PVC and galvanised beads adapt to your material, giving the same reliable edge and support every time.
- Reduces Cracking
Corners and edges are the most vulnerable areas as plaster dries. Beads provide reinforcement at these points, helping to prevent shrinkage cracks and maintaining that clean, professional appearance.
- Easy to Handle On Site
Lightweight PVC beads and durable galvanised profiles are simple to install on-site. They save you effort, reduce fatigue and allow more precise work on tricky corners and reveals.
- Trusted by Pros
Plastering beads have been a staple in professional toolkits for decades. Choosing a high-quality bead ensures the finish lasts, looks sharp and meets client expectations without repeated adjustments.
How to Install Plaster Beading
Installing plaster beads properly is just as important as choosing the right type. Done right, they provide crisp corners, protected edges and a professional finish. Done wrong… well, you know the story.
Whilst installation varies from product to product (please check the manufacturer’s guidelines), here’s a general overview of the process:
- Measure and Plan
Before cutting anything, measure the area carefully. Plan your bead layout so that joints fall in logical positions, corners are covered and runs are straight. A bit of planning saves hours of patching later.
- Cut With Precision
Score and snap PVC beads or use tin snips for galvanised beads. Avoid bending or forcing the profile, which can create weak points or uneven edges. Always cut slightly longer than required – you can trim in place for perfect alignment.
- Dry It First
Before embedding in plaster, place each bead along its intended line to check fit, alignment and corner accuracy. This ensures the bead sits flush and reduces adjustments while plastering.
- Secure Correctly
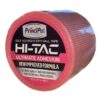
Depending on the bead and substrate, use a bead adhesive. Press evenly along the length of the bead to prevent movement during plaster application. Ensure corners are tight and well-supported.
- Embed Into Plaster
Apply plaster evenly along the bead, pressing the mesh or flange into the wet material. Feather the surrounding plaster smoothly to blend with the wall or ceiling. Avoid air pockets, which can cause weak spots or cracking.
- Check Alignment Mid-Job
Use a spirit level or straight edge periodically to confirm the bead remains straight and true. Small shifts can compound over long runs, so it’s worth checking as you go.
- Clean and Adjust
Remove excess plaster immediately before it sets. Trim overhanging edges carefully to maintain crisp lines. Clean tools and hands to avoid marking the bead surface, especially with light-coloured plaster.
- Final Inspection
Once the plaster has set slightly, double-check corners, stops, and reveals. Ensure all beads are fully embedded, flush and secure before continuing with finishing coats.