



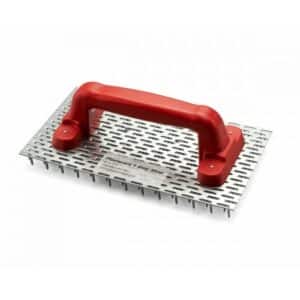

Rendering Scratch Tools
Think applying scratch render is easy? It is with the right tools.
At P1 Plastering Superstore, we offer a wide range of render scratcher tools, replacement nails and plaster scarifiers to meet your rendering needs.
Precision matters, especially when it comes to the thickness of the render being applied. One tip to make this simpler is to use a variety of plastering tools available on our website. These are designed to make light work of your project, no matter how big or small.
Better yet, when you order from our one-stop shop, you don’t just benefit from high quality render tools – you can also count on our team of experts for reliable guidance. Whether you’re looking for more scratching advice or need some product recommendations, we’ve got your back.
What are Scratch Tools?
Scratch tools are essential instruments for rendering and plastering projects to achieve a textured finish on certain substrates. Scratch floats, render scarifiers and comb tools – they’re all tools of the trade when it comes to creating your desired textures and patterns on freshly applied render materials.
How Do Render Scratch Tools Work?
This type of plastering tool is designed to manipulate rendered surfaces to add depth and visual interest to the property you’re renovating.
The process involves using these tools to score the surface in various directions, creating your desired appearance. It’s all about finding the perfect balance of pressure, angle and stroke to unlock the finish of your dreams. And the best part? These scratch tools can also be used to enhance adhesion, ensuring your project stands the test of time.
Types of Render Scratcher Tools
With our wide range of scratcher tools, we’ve got you covered with options that are as diverse as they are effective.
Scratch Render Tools
Consider these tools your go-to tools for creating textured finishes on rendered surfaces. At P1 Plastering Superstore, we offer a wide selection of shapes and sizes to suit your needs, allowing you to add depth and personality to any property.
Scratch Nails
Made from durable stainless steel, scratch nails are designed to provide precision and stability during the rendering process. Each scratch is consistent, resulting in a professional finish every time.
Replacement Scratch Nails
Over time, your tools can wear out or become damaged. That’s why we provide replacement scratch nails to keep your toolkit in top condition. With these high quality nails, you can continue to work with confidence, knowing you have reliable tools at your disposal.
Plaster Scarifiers
Scarifiers are used to create a key within the render basecoat, this key then improves adhesion between the basecoat and the top coat render.
Benefits of Scratch Tools
Like you need more convincing.. but here you are anyway! Here are several ways investing in high quality scratch tools is a smart move for your projects.
- Better Adhesion
Scratch tools create textured surfaces that offer better adhesion between layers of render and plaster. Enjoy a finish that’s not just durable, but also long-lasting.
- Professional Finish
With scratch tools, you have the power to customise the texture of your surfaces to achieve the exact look you’re after.
- Aesthetic Appeal
Textured surfaces, created with a trusty scratch tool, can add visual interest and depth to any property.
- Easy Application
Scratch tools streamline the rendering process, making it faster and more efficient for your team.
Application Tips
Sure, scratch tools may seem like another notch on the plasterer’s belt, but there’s more to them than meets the eye. Here are a few application tips to help level up your plastering game.
- Light Touch, Big Impact
When getting started with your scratching tools, don’t be heavy-handed. Applying low pressure ensures smoother, more controlled strokes so that your tool can work its magic without leaving a mess in its wake.
- Practice Makes Perfect
Like Rome, flawless render projects aren’t built in a day. Take the time to hone your skills through practice and experimentation. Try out different techniques, angles and pressures to find what works best for you.
- Render Thickness
It’s all about finding that sweet spot – not too thick, not too thin. Ensure you evenly spread the right amount of render thickness to avoid scraping through to the surface level. Consistency is key for achieving that perfect finish.
Maintenance and Care
One of the best trade tips we have to offer to optimise the full potential of your scratch tool is proper maintenance. Take care of your plastering tools, and they’ll take care of you.
A great place to start is by keeping your tools clean after use to prevent the build-up of debris. A simple rinse with warm, soapy water does the trick – just make sure you store them in a dry place to avoid rust and corrosion.
If you notice any damage to your rendering scratch tool, we recommend these be replaced as soon as possible. And hey, if you need replacement scratch nails, you know where to find them!
Frequently Asked Questions
Find answers to all your scratcher tool queries. Got a question we’ve not covered? Give our team a call today.
-
Can scratch tools be used on different surfaces?
Render scratch tools can be used on various materials, including render, plaster and stucco. Just remember to ensure this is applied properly for optimal results!
-
How long should you leave render before scratching?
This will depend on factors like weather conditions and the type of render used. In general, we recommend allowing the render to firm up for 24-48 hours before scratching.
-
How do you get a rough render finish?
First things first, you’ll need a scratch tool! We recommend applying your render with a scratch float and then using a comb tool to create your desired textured finish. You can adjust the pressure and angle of your plastering tools to control the depth and texture of the finish.